Friday, February 27, 2009

Making a Lunch Bag Out of Old Jeans

My husband needed a new lunch bag so I set out to make one. I found a free pattern at Loving Our Earth at Victoriana Quilters.

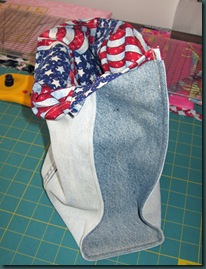
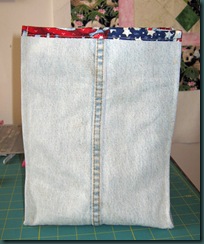
lunch bag1My husband thought that I should make it out of some of his old beat up jeans. So that is what I did. I cut up some light denim from a pair of his jeans and some darker denim from an old jacket. I even incorporated the seam from the pair of pants. I thought about adding other decorative elements, but I figured my husband would not really want all of that on his lunch bag.

lunch bag3

I picked out some patriotic fabric from my stash to line it with. I was trying to find a fabric he would not mind as the lining. If it were my lunch bag I probably would have picked something else. I think it took about 2 hours to make it..not long to help the environment.

Chris

Monday, February 23, 2009

Working On My Landscape Again…

I decided to get my landscape challenge out and work on it today. I am home from school because I am not feeling well, but wanted to get some projects done. So far I have kept my noodle soup down from lunch so I think things are starting to settle down.

I fused the pieces of the landscape in place and sewed the edges of the pieces down with a zigzag stitch and invisible thread. The skinny pieces like the thin trees I just used a straight stitch and sewed right down the center of these pieces.

stitching pieces down with invisible thread

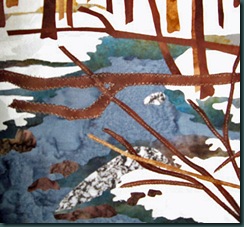
Here you can see the thicker tree with the zigzag stitches and the thin branches with the straight stitch. I know that a lot of people don’t like invisible thread, but I don’t mind it at all.

While I sew the pieces in place I stabilize the piece with tracing paper on the back of the landscape.

landscape pieces sewn down

You can see the tracing paper peeking out and all the pieces sewn in place.

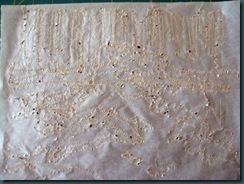
The tracing paper is quite a mess from the back of the piece and I will have to carefully remove it using tweezers. Last summer when I worked on my mom’s house quilt, I discovered that masking tape helps to pull off the tiny pieces of tracing paper and cleans up the back really well.

back of piece

The back is really ugly and a big mess!

back

The back looks so much better after taking off the tracing paper. It does take some time to remove the paper. I just put on some Loreena McKennitt and tear away.

Chris

Saturday, February 14, 2009

“Beat the Winter Blues” PC Swap

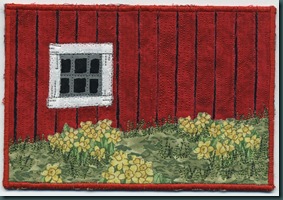
redbarn

I had to make another postcard for a swap in one of my yahoo groups. I decided to create the side of a red barn with daffodils blooming beside it.

I love seeing daffodils blooming in the spring especially after such a long, cold winter like the one we just had or are still having. Seeing the yellow of the daffodils just makes me happy. Also I have always loved the intensity of a bright red barn. I thought both of these could chase away the winter blues.

I tried to make sure that I did some thread painting since that is a skill that I need to improve. I think it came out pretty good, but I am never sure how much I should do for these swaps. Sometimes I feel that I should have done more although this card took about 5 hours from beginning to end since I don’t work really fast.

Now that I look at it I realize that the window is pretty low and very close to the ground. Oh well…too late now! This is a barn for hobbits.

Chris

Saturday, February 7, 2009

Making a Quilt of My Parent’s House

mom and quilt2

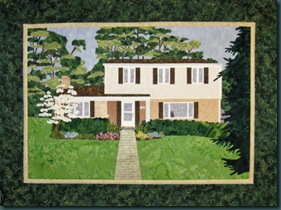
This a photo of my Mom when she opened the quilt of my parent’s house that I made for her 80th birthday last August. It is my favorite photo of the quilt. A lot of people at the party thought that it was a painting rather than a quilt. I spent most of last summer working on this quilt. I thought that I would give you an idea of how I made this quilt.
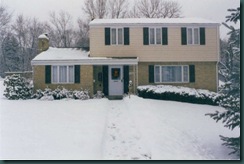
CURRENT HOUSE

I started out with a photo of the house. It was actually a fairly out of date photo, but it was all I had to work with when I started the project. The photo shows the house in the winter. This is how I got started.

  1. I printed out the photo of the house as large as I could make it on an 8 1/2 in by 11 in sheet of paper.
  2. I placed a sheet of transparency film over the photo and traced the image with a permanent marker. I used one of my pigma pens because it has such a thin tip. I wasn’t too careful when tracing things that were straight lines since I planned on measuring them and using my rotary cutter to cut these pieces out. That would include things that must be straight like windows, doors, etc.
  3. I then put a plain white sheet of paper behind the transparency image and scanned it into my computer so I could print it out. house sketch
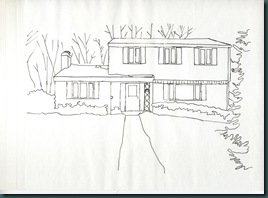
  4. I took this scanned and printed image to Staples to have them make an enlargement for me. I think I had it enlarged 250%. (or maybe it was 200%). Once I had it enlarged I had a pattern to make the quilt. Unfortunately I did not save the copy made at Staples so I cannot show you that.
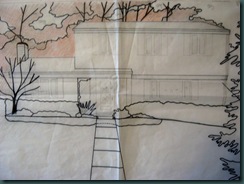
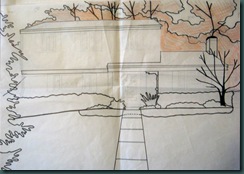
  5. I used a large sheet of tracing paper and put that over my Staples print and traced the 250% enlarged house with a pencil and ruler. I use tracing paper since I can use a dark marker to trace the lines of pieces I want to create using fusible web. The trouble with that is that you must reverse these when you trace the pieces onto fusible web. The tracing paper allows me to do that. I just flip the tracing paper over for my pattern pieces.

    The pattern for the house traced onto tracing paper. You can see that it has been folded up in my closet since I finished the quilt last August. The parts of the house I did not go over with a dark marker, I used my ruler and rotary cutter to create those straight pieces.patternThis is the reverse side of the tracing paper pattern that I used to create my fusible web pieces.pattern reversed
  6. I used Steam a Seam 2 Lite for the fusible since I needed the pieces to stay in place as I created the house. I am not thrilled with this fusible for any other reason. It is too heavy and it gummed up my needle when I stitched through it. But it was great for keeping all the small pieces in place.

I asked my Dad if he thought that my Mother preferred a winter or summer scene and he thought that summer would be better. I had him send me more photos of the house since all I had was a winter photo.
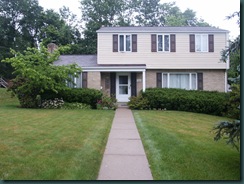
house 08 002

Here is a series of photos showing the progress of the quilt from beginning to end.
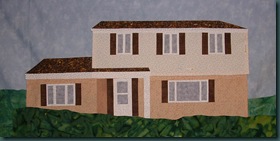
house

Here is the house at the very beginning of the process. Doesn’t look like too much at this point. I was almost ready to pack it in and buy her a gift for her birthday. I carried on due to encouragement from my daughter. The house is in Pittsburgh, PA and it hardly is ever sunny which is why the sky is so gray.
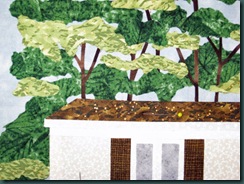
close up of trees

Here I am creating the trees behind the house. I just randomly cut pieces of about 3 or 4 different fabrics to create the leaves on the trees. My husband was really impressed with the trees because he thought they looked very realistic.moving along
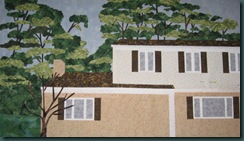
We had a big debate about what color of green to use for the grass in the front lawn. I had a darker green and a lighter green. We ended up using the lighter green.
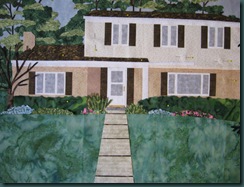

new house photo

This is the house with the darker front lawn. I was also doing a funky thing with the front walkway that I changed my mind about.


house light

This is the house with the fabric I finally used for the front lawn and the corrected front walkway.


I also had some problems coming up with a good fabric for the flowering tree on the left side of the house. The tree was white, but I had a hard time coming up with something. I had pink and I had blue, but the tree was white!
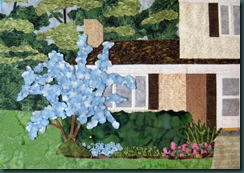
backside of blue fabric

Here is the tree as blue. This is the fabric that I wanted to use, but my Dad emphasized that the tree was white! So no creative license for the tree!
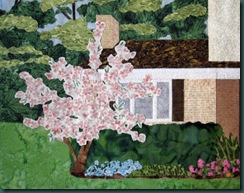
pink tree


I also tried pink-white, but again the tree is only white!
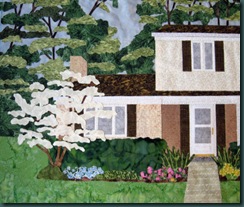
white dogwood


So I had to come up with white!


borders on

So here is the finished top with the border added. Now onto the quilting! My machine was acting up so doing much free motion quilting or thread painting was pretty much ruled out. Since I am new to free motion, I thought it was me. I ended up taking my machine in for service after this quilt. What a difference!


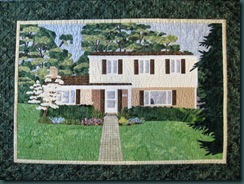
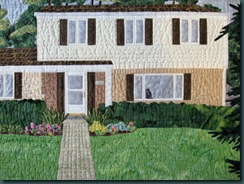
Here are two photos of the final quilt.
housequilted

I think the quilt came out great and my Mom was really surprised. My Dad designed this house so I wanted to make sure it really looked like their house.
closeup


Yes that is a cat in the window. That cat is no longer alive, but use to make my Mom crazy because she always sat in the front window. I printed the cat and the house number on Printed Treasures.

I will be teaching a free class on making a quilt of your house on the Learning FA group in May of this year. If this is something you always wanted to do why don’t you join us there?

Chris
Friday, February 6, 2009

“California Dreaming”

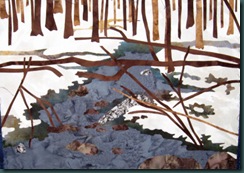
landscape I think that is what I am going to call the landscape quilt. I have decided to go with the darker gray blue fabric for the water. Shirley from Learning FA suggested that I paint the fabric along the banks bluish with darker blue near the shoreline. I tried to do that, but I am not sure it came out too good. I used the Setacolor transparent paints. It came out more green than I wanted. Maybe painting this fabric brown would have been a better idea. Too late now!

Short of tearing it all apart again I am not sure what to do with it. I don’t want to tear it apart and start again. I guess I could add some browns fabric in spots over my “botched” painted fabric. This entire shoreline is covered with leaves so maybe I should add fabric to simulate the leaves. I don’t know if thread painting it with brown will tone down the greenish look it has. This area definitely needed to be darker than it was after I used the darker water fabric, but not green.

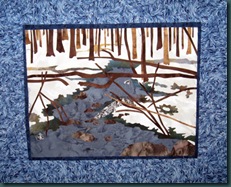
framed I thought that I would try out an idea for borders while it is on my design wall. I think I am going to go with it as it is. Hopefully the finishing touches will make all the difference.

Chris

I’m So Confused!!!!!

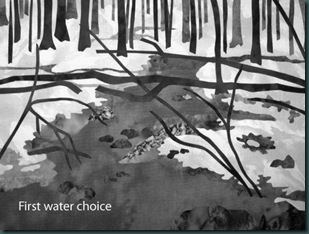
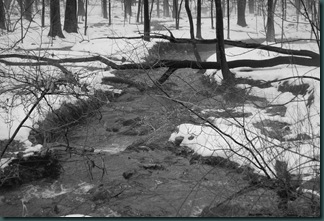
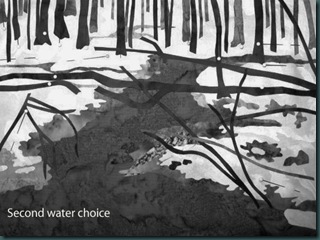
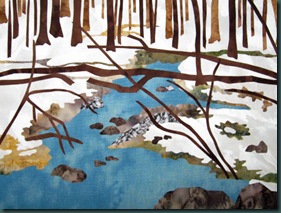
I kept looking at the water fabric choice in my landscape challenge all week and kept thinking that it should be darker than the fabric I picked. I was thinking that the water should be more gray and less blue since it was a gray day when the photo was taken. Also I know that I have to watch when I make landscape quilt that I don’t create too much contrast between the fabrics. I know that when making a patchwork quilt that contrast is important. In nature the shades blend more and there can be less contrast. So I stopped at the quilt store yesterday to pick another fabric for the water. I picked three different ones to try out, but the other two are too dark. I can use the other ones for trees in a future landscape quilt.

I lifted all the pieces to put the darker water fabric in place, but now I am not so sure….maybe my first one was better. I do this second guessing thing all the time. The point of this entire exercise was to get over “perfectionism”, but I guess I have not reached that point yet!

Usually I ask my daughter, but she is away at school. Right now she is probably breathing a sigh of relief since she hates it when I keep asking her questions about my fabric choices. Maybe you can give me your thoughts. Please help me!!!

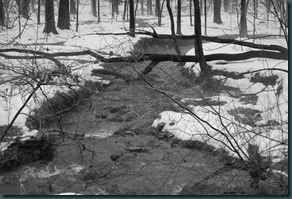
This is the black and white photo for the challenge.

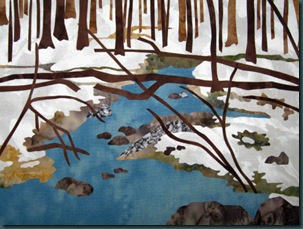
blackandwhite This is my original scene with the original water choice

landscape

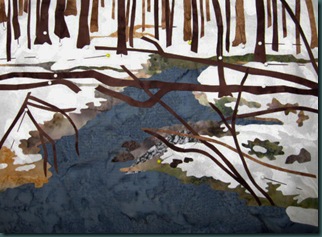
This is my darker water fabric in place (some things are missing that I have to put back in place)

darker water

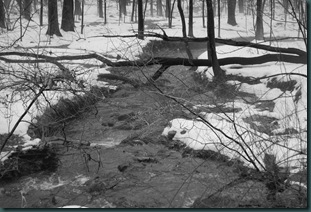
Now what I am going to do is post the original black and whiter photo and each of my landscape quilts turned into a black and white image. I thought this would help me sort out the value of the water and other landscape elements to see what I should do. Here goes….

Photo and first water choice

blackandwhite

landscape1

Photo and second water choice

blackandwhite

landscape 2

What do you think?????? What is the better water fabric to use?

Chris

Monday, February 2, 2009

Janet has claimed her prize

image Janet has been feeling a bit under the weather so winning the book and templates was just what she needed.

Now I need to look at some weather maps to see how bad this storm is going to be in NJ tomorrow.

Chris

Sunday, February 1, 2009

And the Winner Is…….

image

I used a random number generator to pick the winner of the book and templates.

The winner is Janet Hartje!!! Janet, looks like you have another quilt project to start working on. Please contact me at my email address: dvontish@comcast.net so I can get your shipping information. You have until Saturday, February 7 to contact me. If I have not heard from you by then I will pick another name for the winner.

Thanks to all those that entered comments in order to win the book and the templates. It was amazing how fast the last 2 weeks went. I am hoping the rest of the winter goes that fast.

Happy groundhog day!

Chris

Main Parts of the Landscape are in Place

landscape

The main aspects of the landscape are in place. Most of the fine detail will have to be thread painted/quilted. At this point I am going to leave it on my design wall to “marinate” for a few days and look at it again to decide if there are any more fabrics I have to add.

So here is my plan:

  • I will iron the pieces in place and use invisible thread to secure the edges of the pieces.
  • I will draw in the many tree branches and background trees with a water soluble pen so I will have some kind of plan when I stitch them in by machine. At that point I do want to add some dried leaves with fabric to the branches in the foreground.
  • Once I do that I will square up the top and add borders.
  • After that I will add batting and backing and do the quilting/ thread painting. I usually thread paint during the quilting process. I seem to have better luck doing it that way. I just have to remember to keep all the stitching fairly even so the quilt will be flat.
  • Then I will bind the quilt and wash it. Yes I always wash my quilts even my landscapes.

Go, Steelers!!! ( I am from Pittsburgh.)

Chris